Reviving a 20-Year-Old iMac G4
Diagnosing and repairing a non-booting 2003 iMac G4 by tracking down a failing power-supply capacitor, reverse-engineering the PSU, and bringing a design icon back to life.
• Matthew Lyon
Last year, I was given a 20-inch 2003 iMac G4 that came with all of its original accessories and was in excellent external condition.
Unfortunately, it would not boot.
The first thing I noticed when attempting to power it on was a high-pitched chirping noise coming from inside the lampshade. It was barely audible, but unmistakable in a quiet room. That sound turned out to be important foreshadowing.
After scouring forums and old repair threads, the most common suggestion I found was… unconventional: use a hair dryer on the fan cover at the top of the lampshade for 3–5 minutes. To my surprise, this worked. Once warmed up, the Mac would boot normally and run indefinitely until shutdown.
When it was running, it felt like a time capsule back to the early 2000s.
64 GB of storage, 1.5 GB of RAM, and AirPort Extreme Wi-Fi, fully maxed out for the era.
Clearly, something was marginal and temperature-sensitive.
Disassembly
Taking apart the iMac G4 starts from the user-serviceable panel on the bottom. Beware the aluminum captive screws. They strip very easily.
Inside, the right edge of the case is packed with tight cable runs. Disconnecting the hard drive and DVD cables allows the base to clamshell open from the top half.
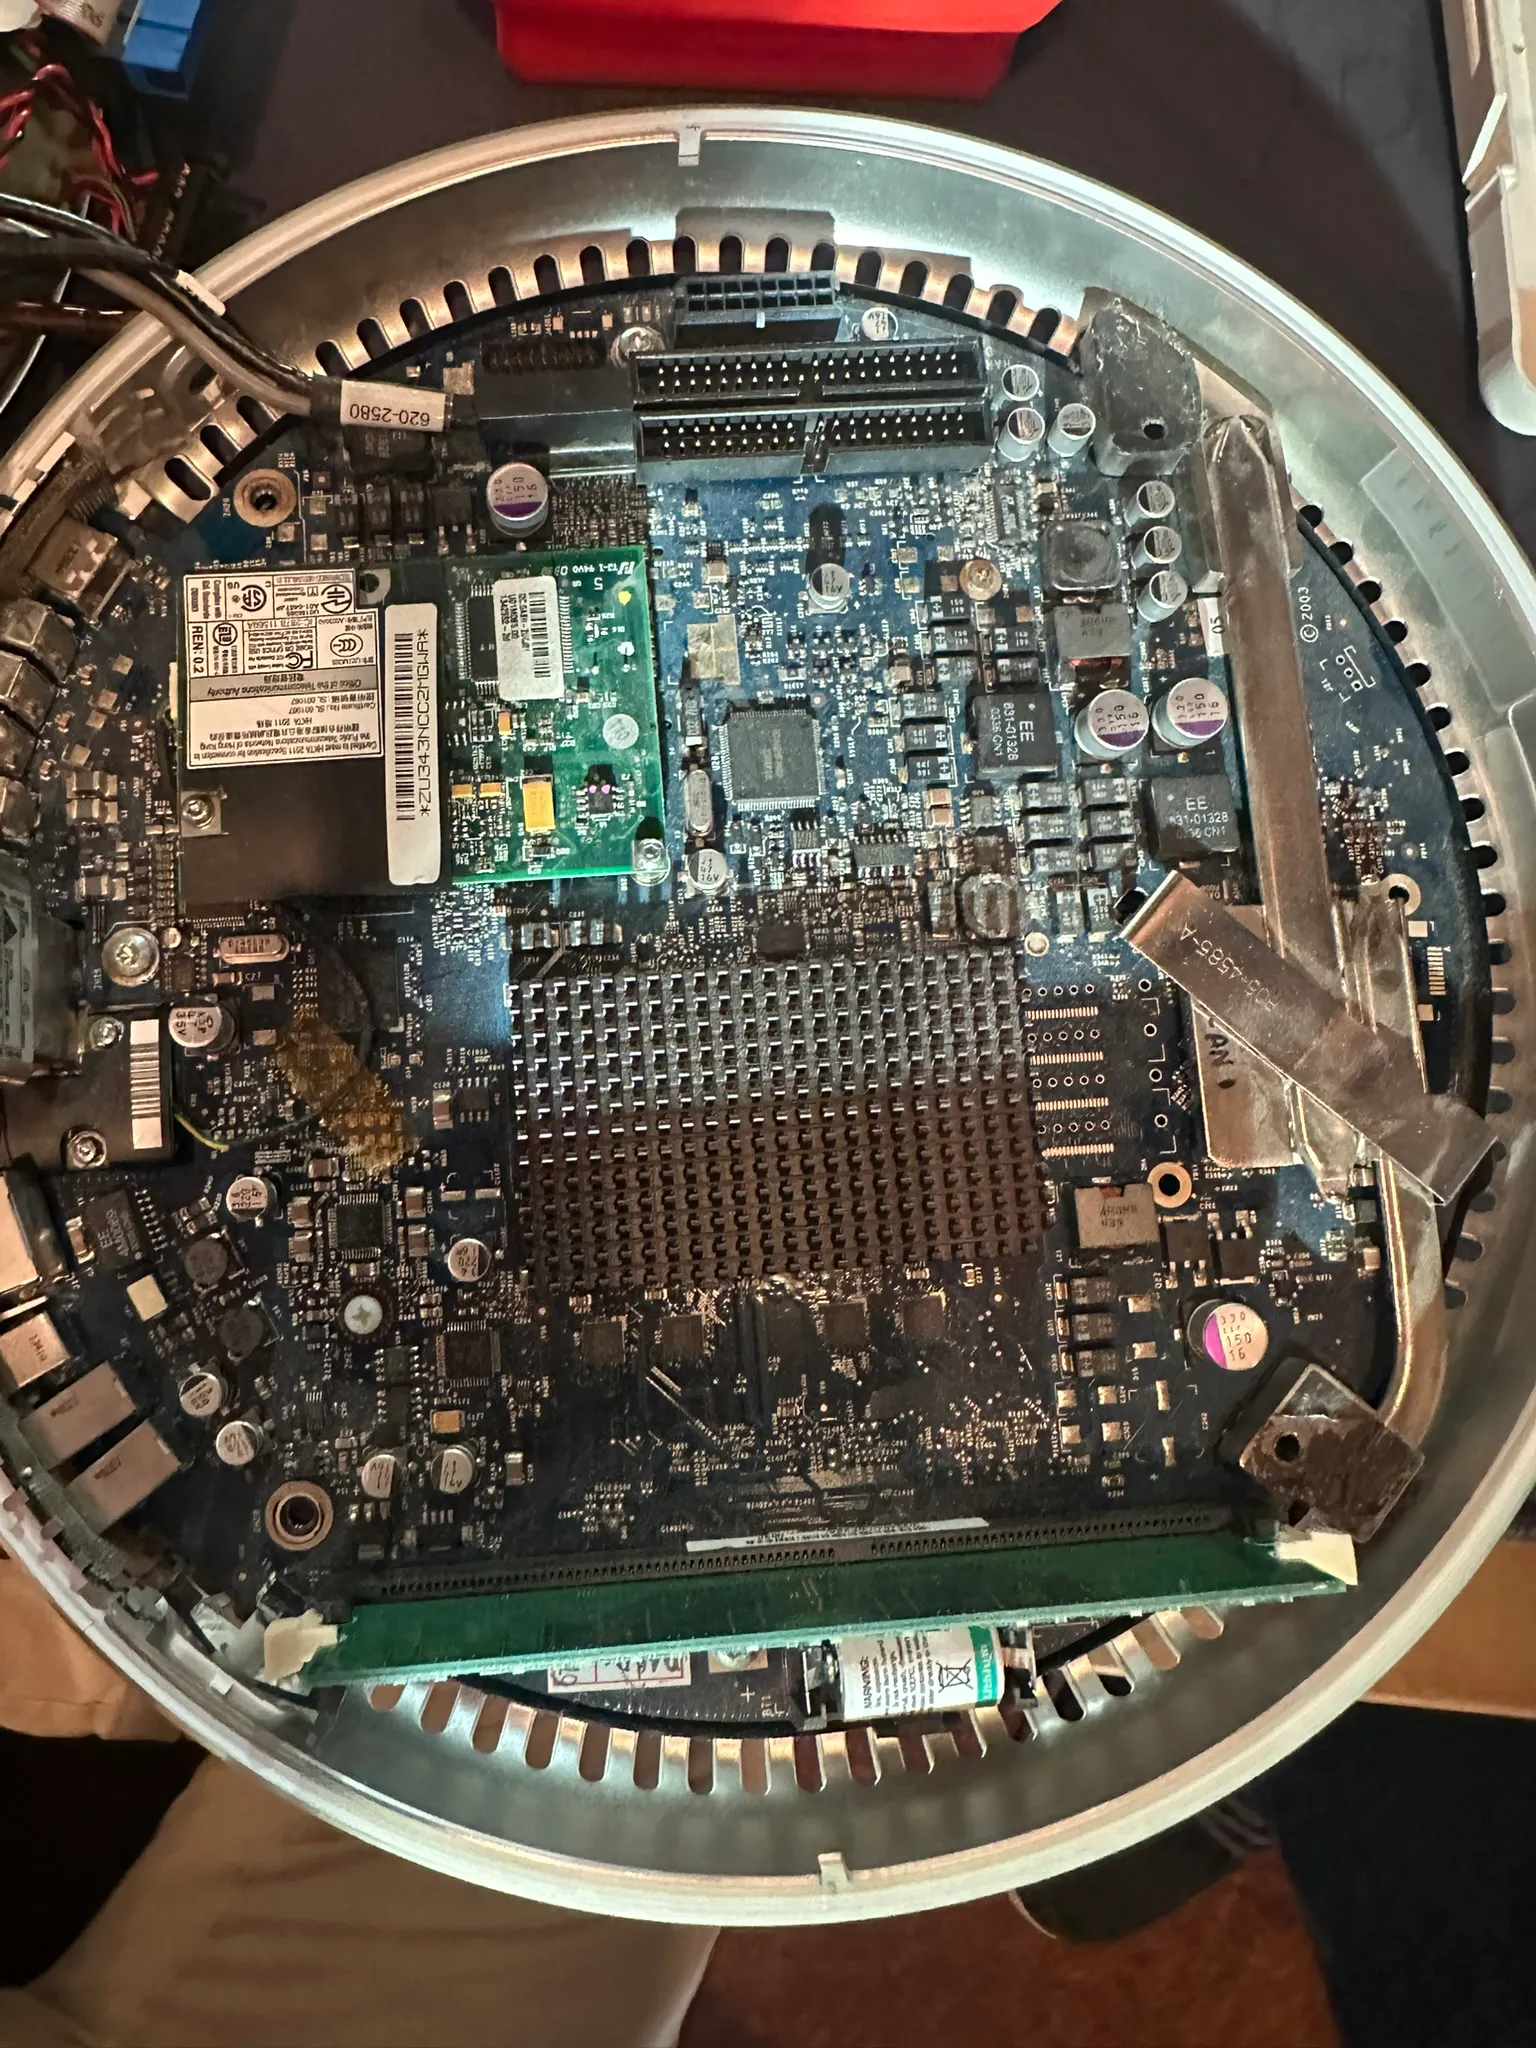
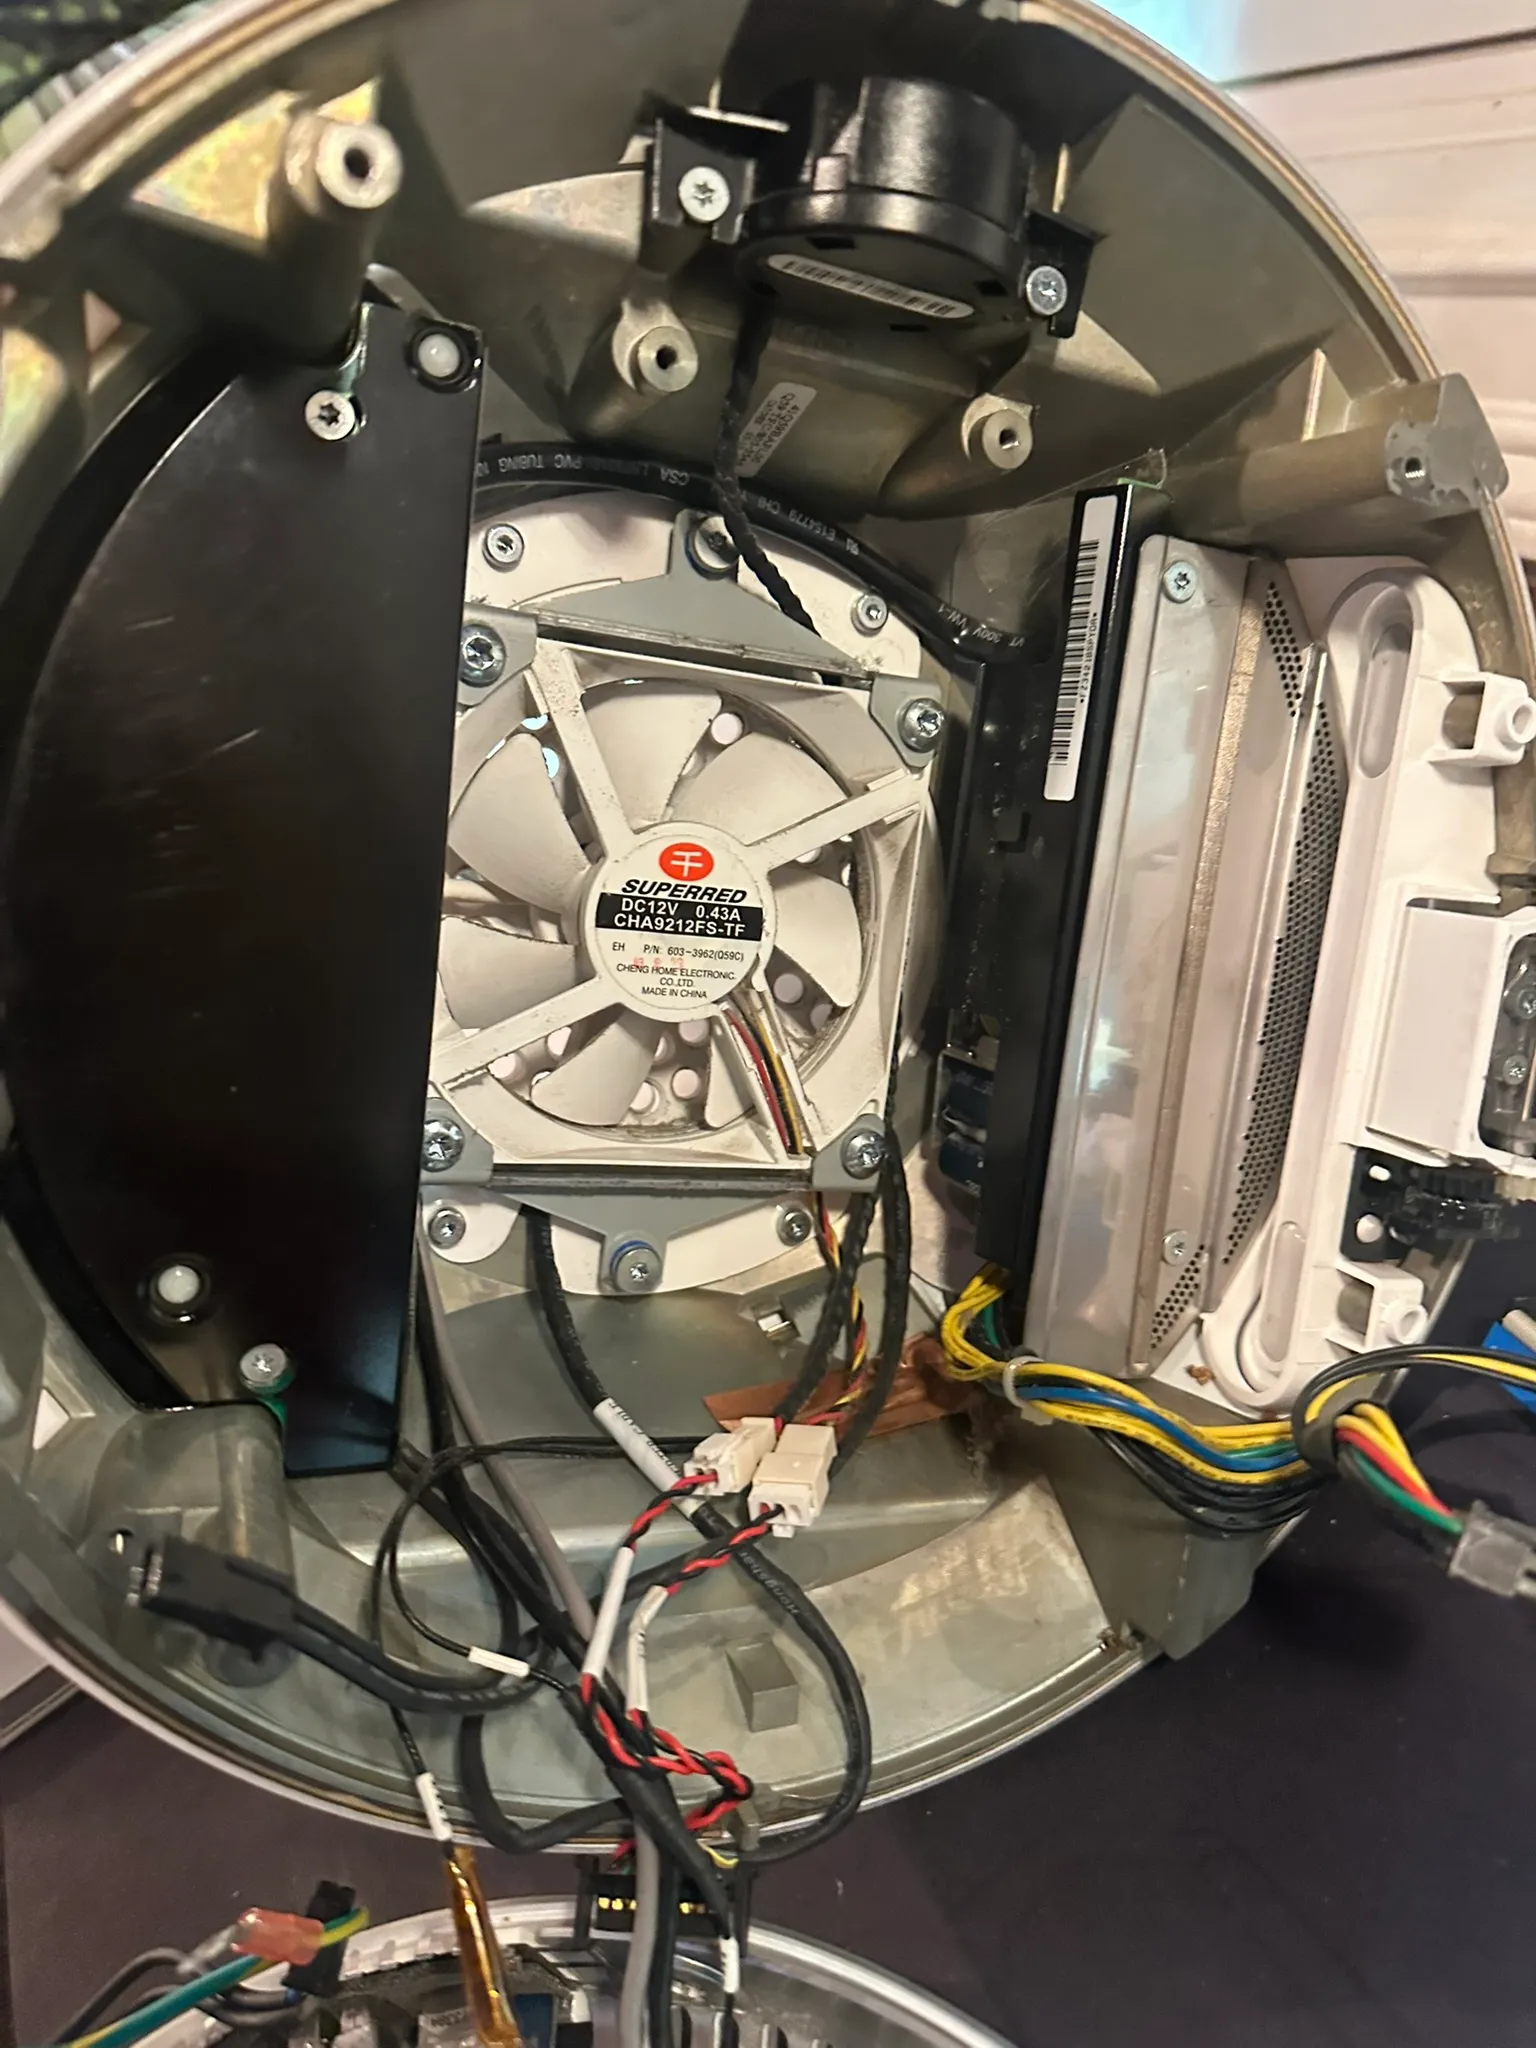
After removing the drive chassis, you gain access to the upper fan, speaker, and the split-stage power supply.
I replaced the RTC battery with a new one just in case, but the original measured fine and was not the culprit.
The Power Supply
The power supply was the obvious suspect, and it was also the source of the chirping noise. Once the computer was running, that noise settled into a faint continuous tone.
I began probing the supply and inspecting components, especially electrolytic capacitors. One large blue capacitor immediately caught my attention: 450 V, 100 µF.
I measured it with the capacitance function on my Fluke meter and assumed it was dead.
Spoiler: it wasn’t.
Lesson learned: capacitance measurements on a multimeter are meant to be done with the component isolated.
Still, the capacitor was easy to desolder after removing the snap-fit plastic covers, so I replaced it with a compatible part from Digi-Key. After reassembly… nothing changed.
Over winter break, I removed more of the system, tested individual components, and slowly began reverse-engineering the power supply.
Technical Deep Dive: PSU Architecture
The iMac G4 uses a two-stage power supply with a surprisingly elegant design.
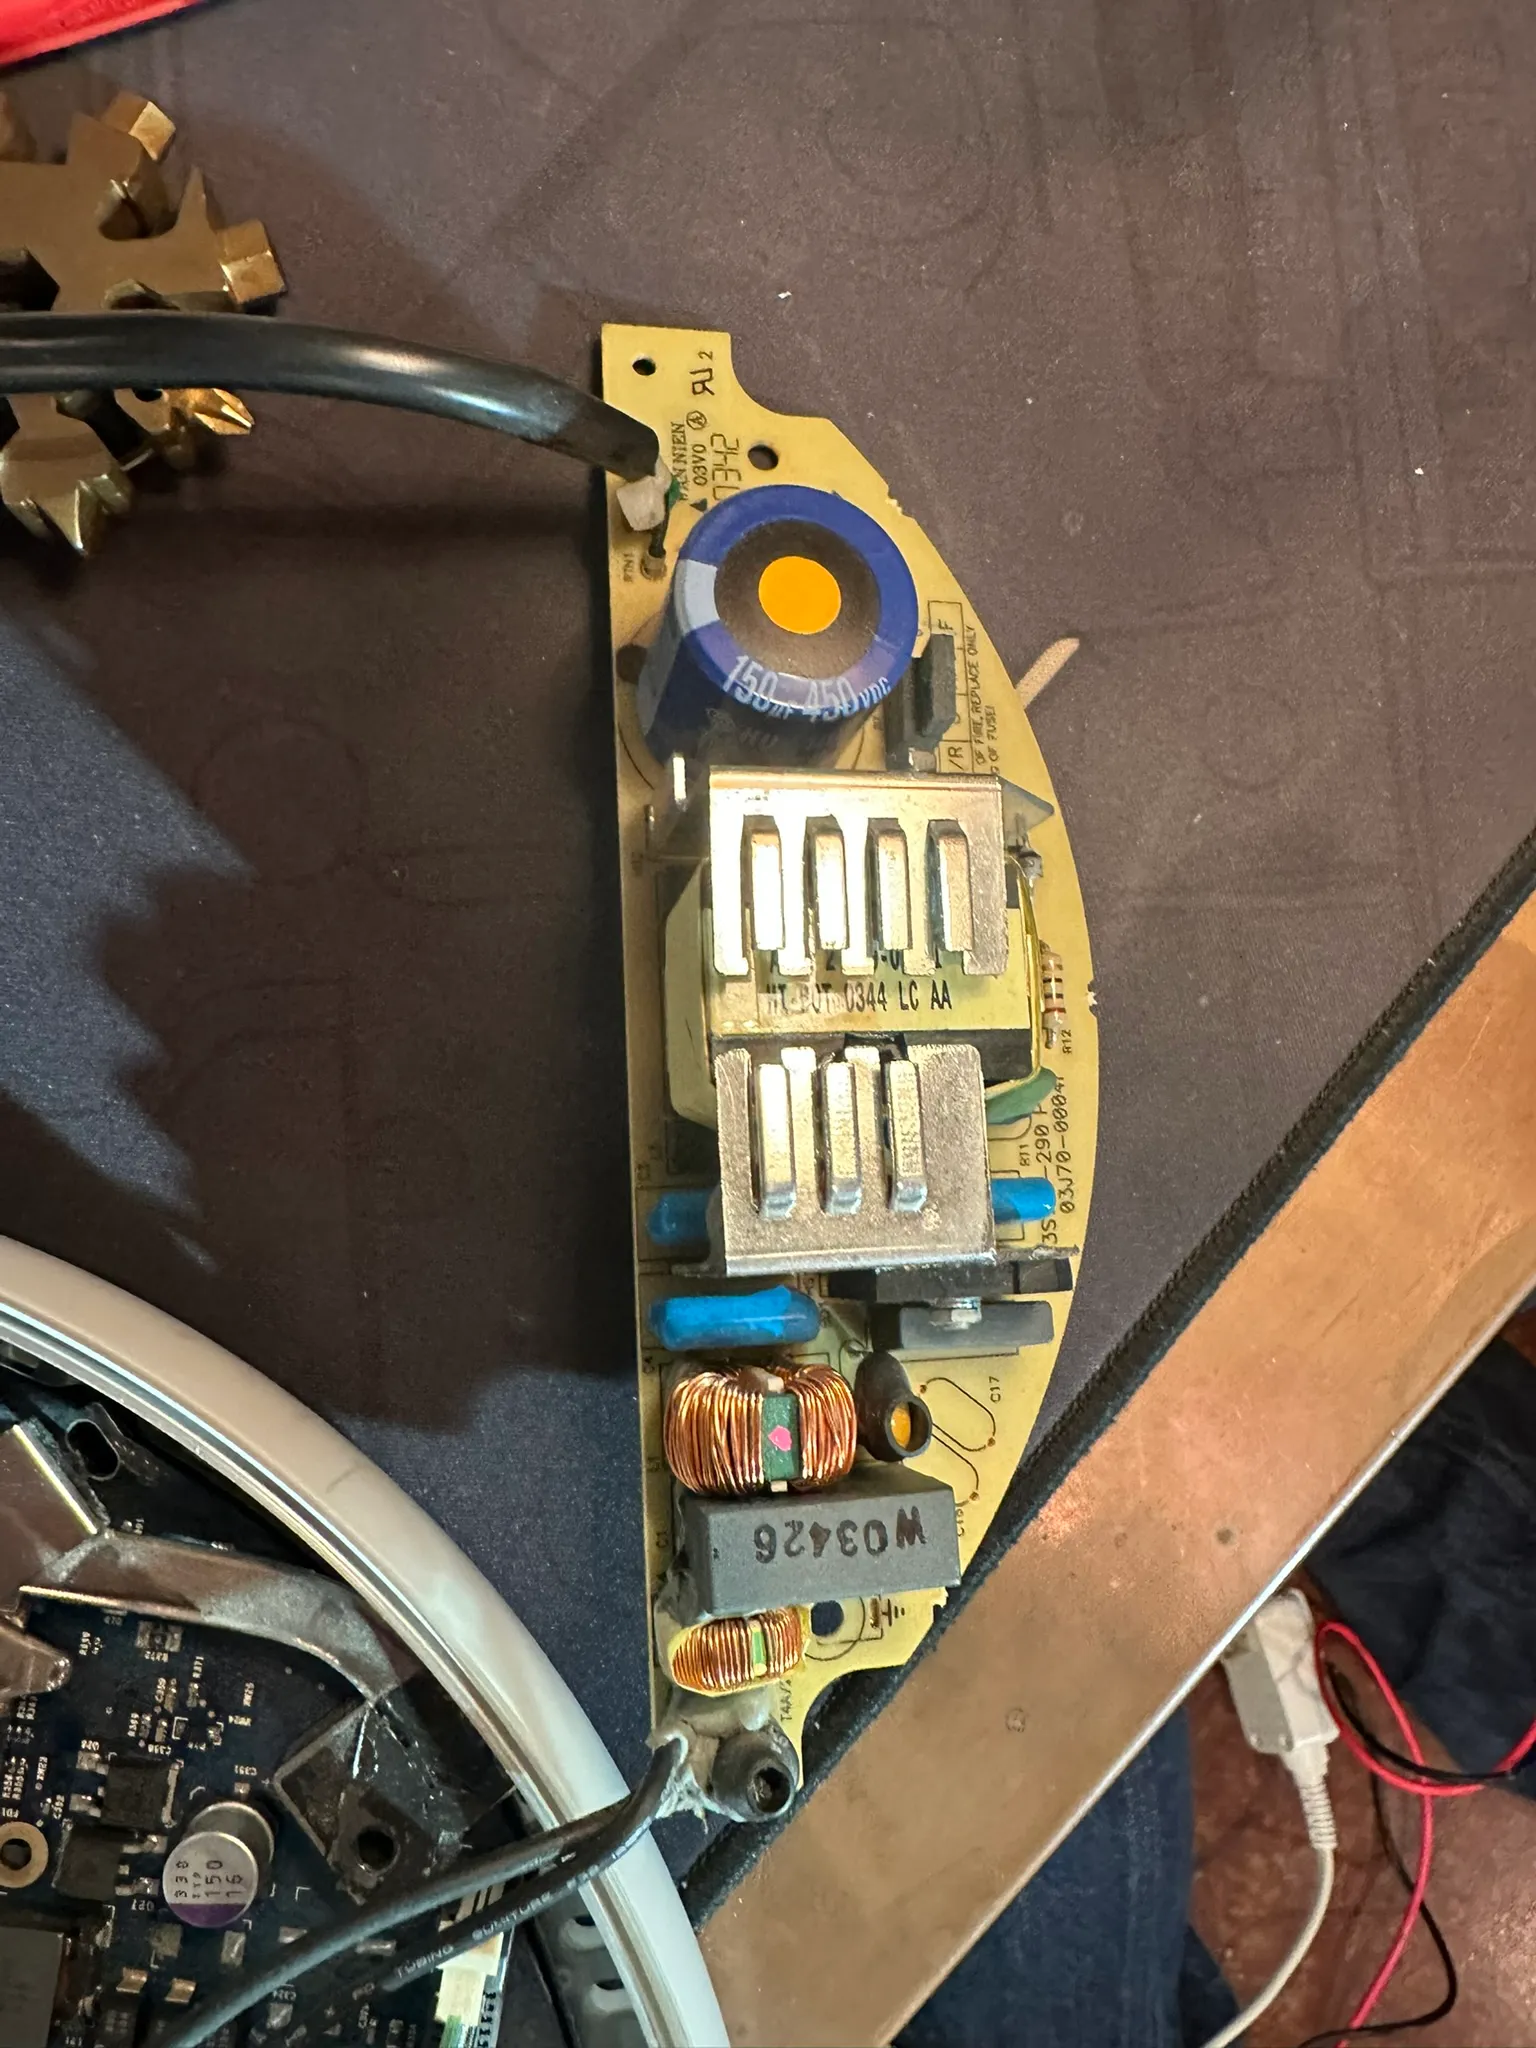
First Stage
- AC input is rectified using a full-wave bridge.
- The rectified DC feeds a boost converter that raises the voltage to ~350 V DC.
- This stage also includes power factor correction.
At first, I mistakenly assumed one large magnetic component here was a step-down transformer. It was actually part of the PFC boost circuitry.
Second Stage
- Receives the boosted DC bus from stage one.
- Uses dense SMD circuitry on the back side.
- Produces:
- 12 V @ ~16 A
- 24 V @ ~2 A
Interestingly, the boost stage does not fully start until the second stage feeds 12 V back to the first stage. This feedback dependency made probing confusing and initially misleading.
I even tested the supply with an amateur radio as a dummy load, and it powered cleanly and reliably. At this point, I was completely stuck.
The Real Failure
A few days later, I went back to basics.
While probing the first stage again, I noticed something subtle: one of the four input electrolytic capacitors had a slightly irregular top. The scored pressure-relief lines had begun to bulge.
Listening closely, this capacitor was the exact source of the chirping noise during failed boots.
It took some effort to dig it out of the thermal glue and desolder it from the heavy ground pour, but I eventually got it free.
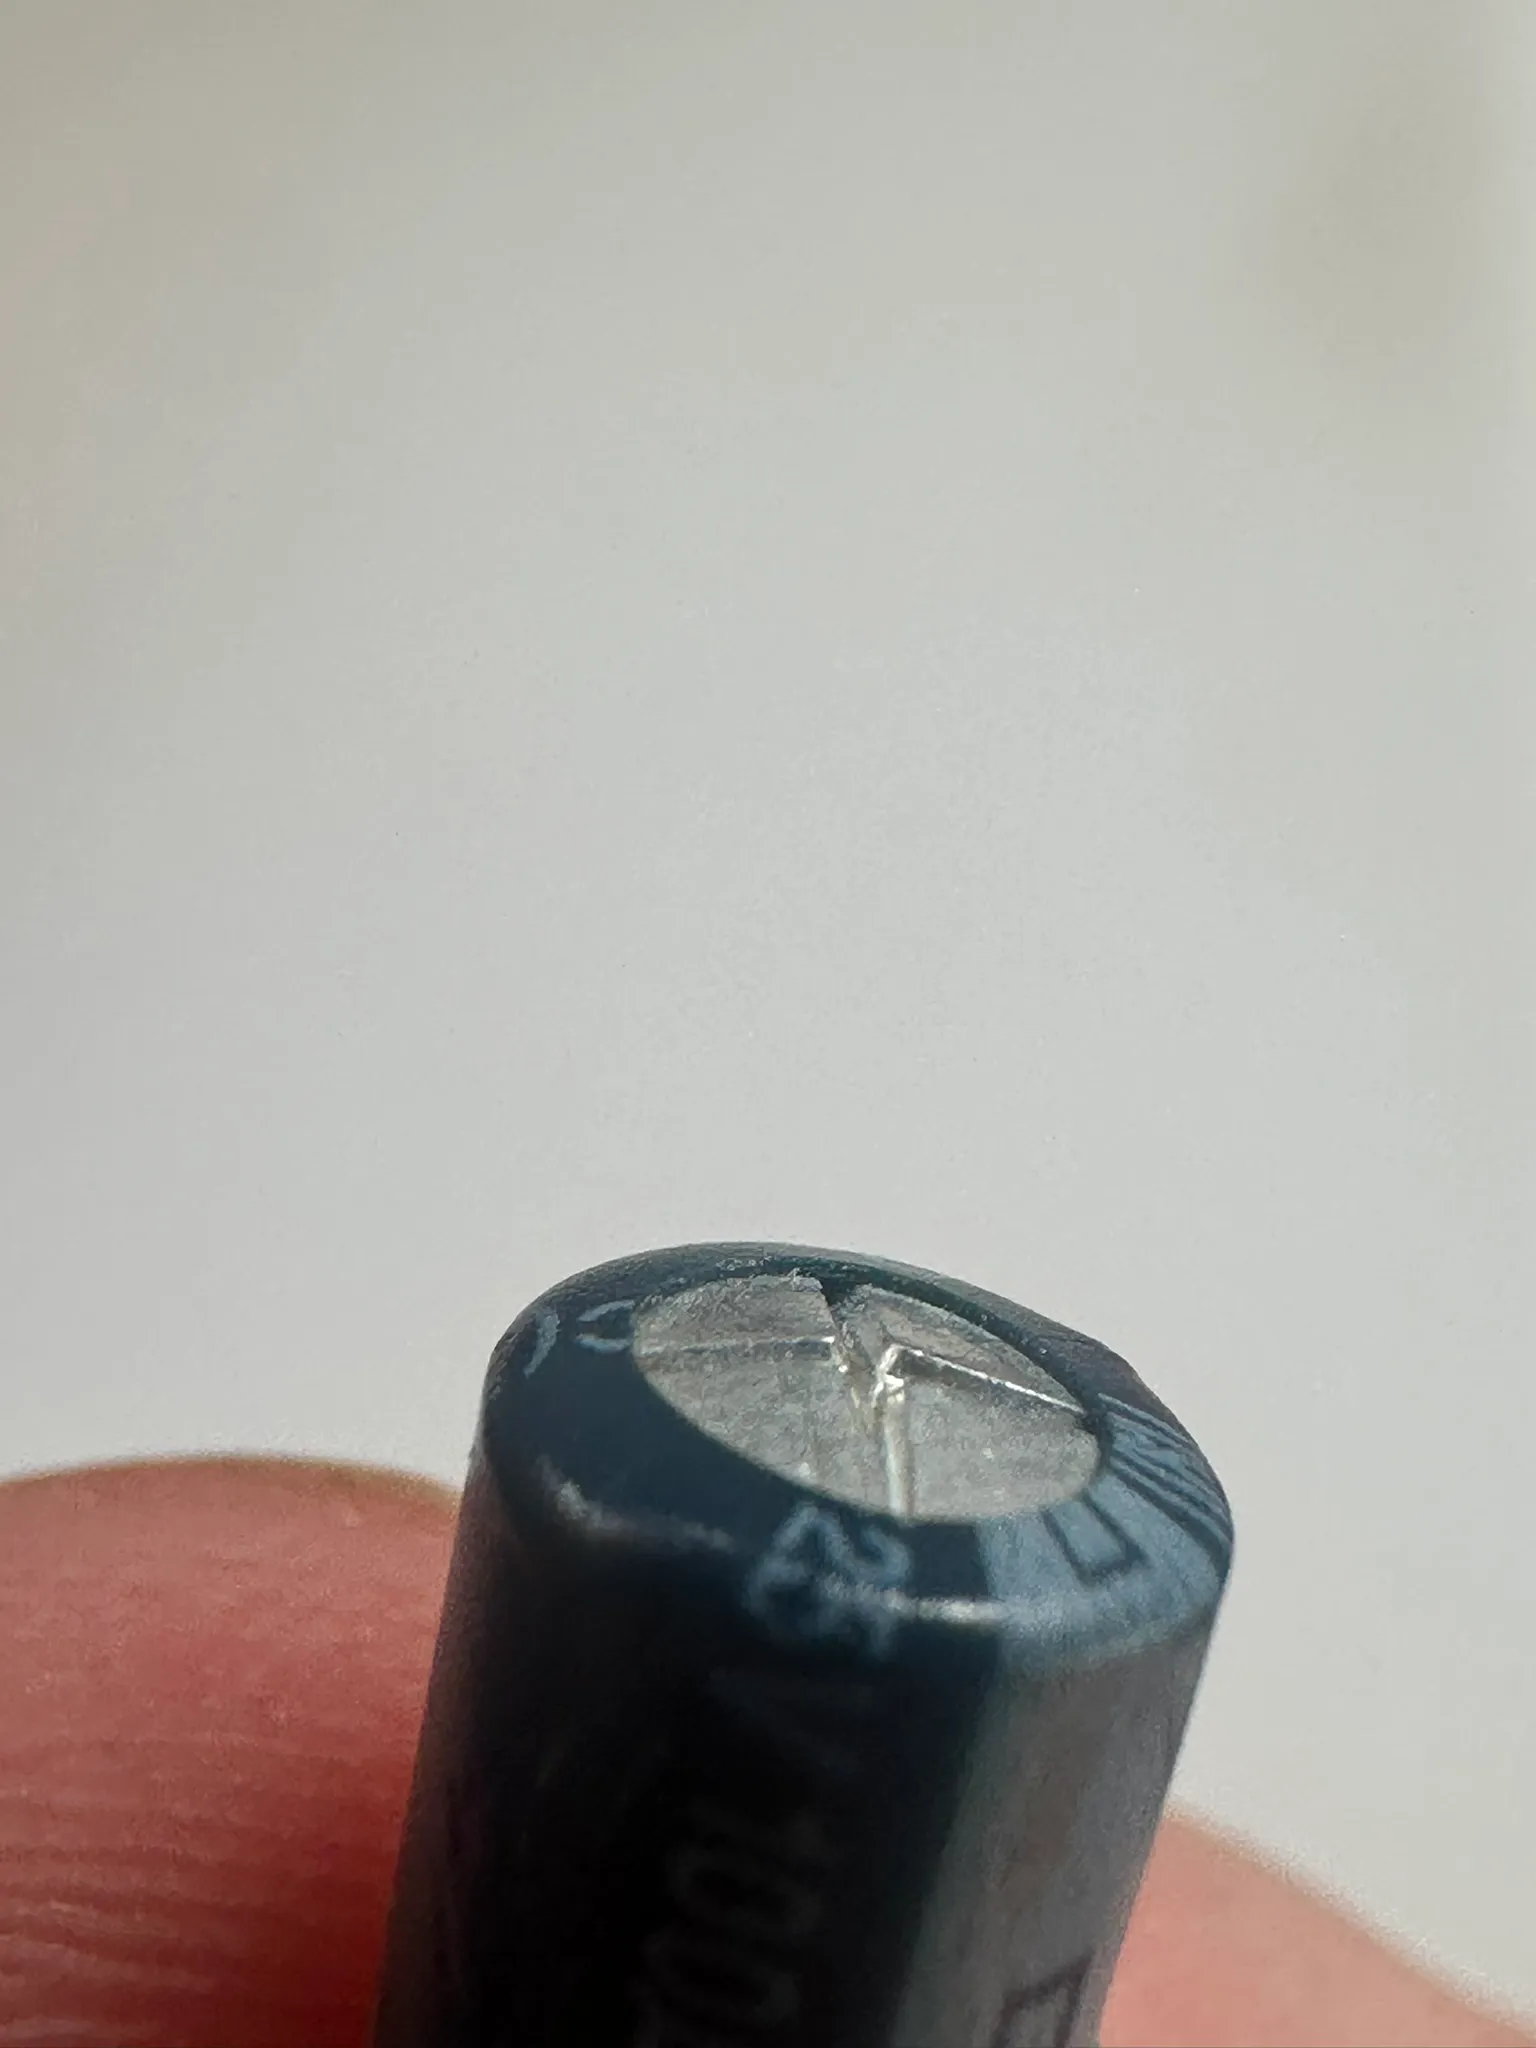
By sheer luck, we had a bag of identical capacitors on hand, rated for a higher voltage but with the same form factor. I installed the replacement and rebuilt the entire system.
Reassembly took about 30 minutes. Apple used the same screws almost everywhere, and honestly, this is one of the easiest Apple products I’ve ever disassembled.
Results
The iMac powered on instantly.
No chirping. No hesitation. No warm-up ritual required.
My biggest takeaway: electrolytic capacitors can audibly whine as they degrade, long before they fail completely.
Life After Repair
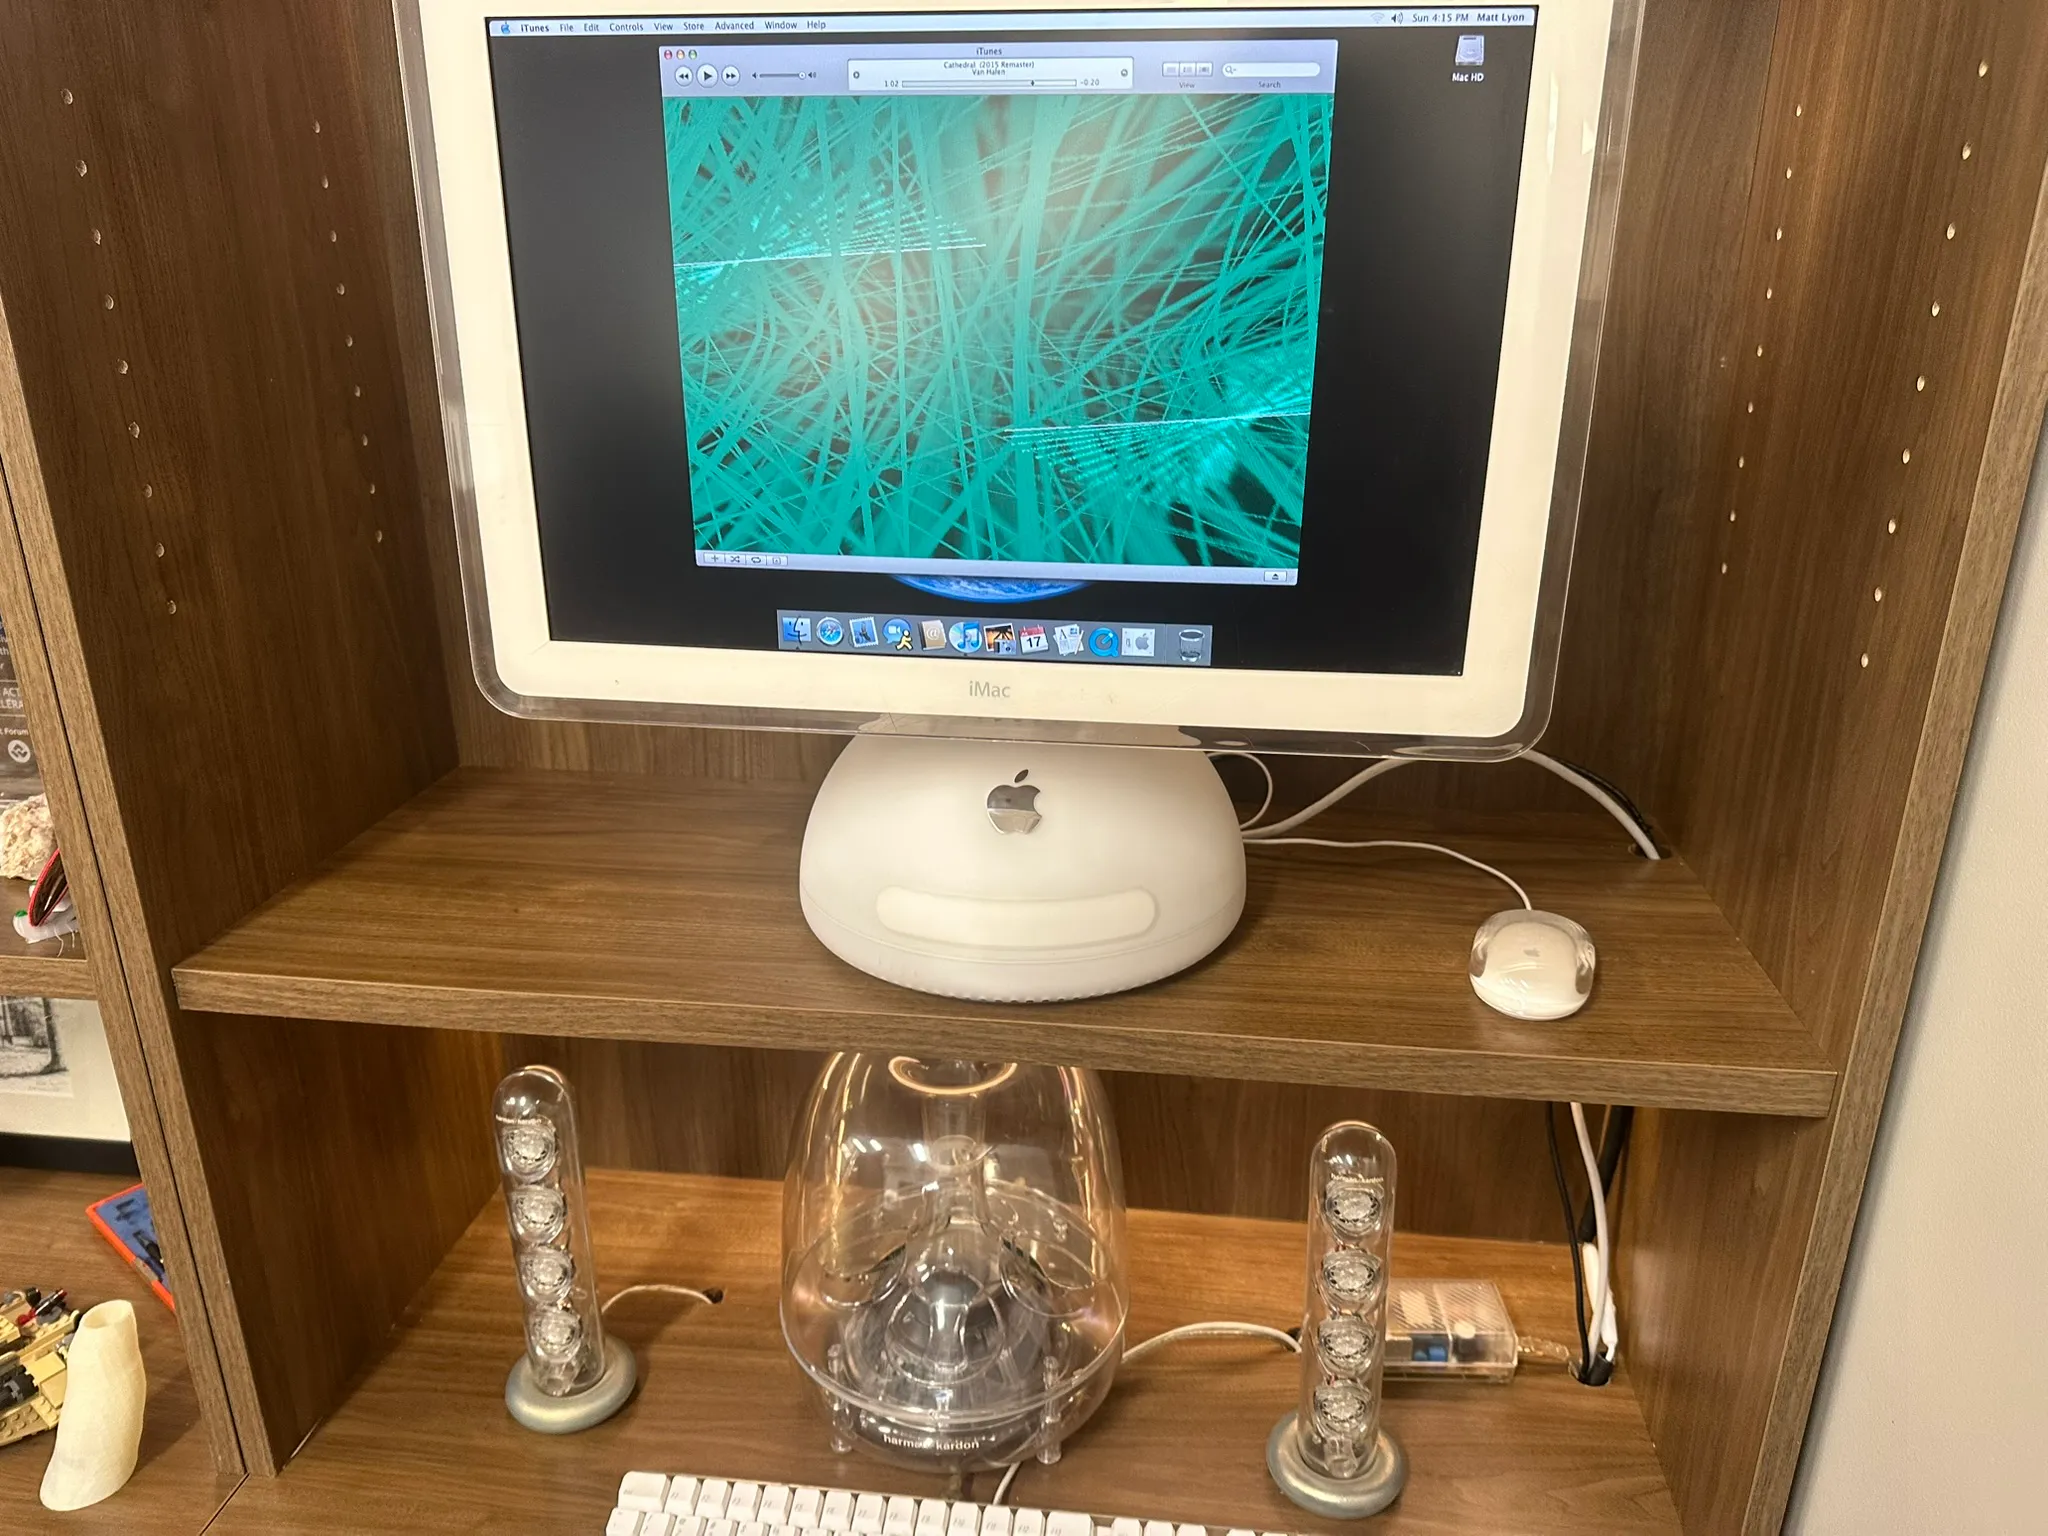
The iMac now lives in our home office running Mac OS X Tiger (10.3).
We:
- Connected it to Wi-Fi
- Proxied modern websites through an HTTP-to-HTTPS gateway
- Loaded ~1,000 songs into iTunes for background music
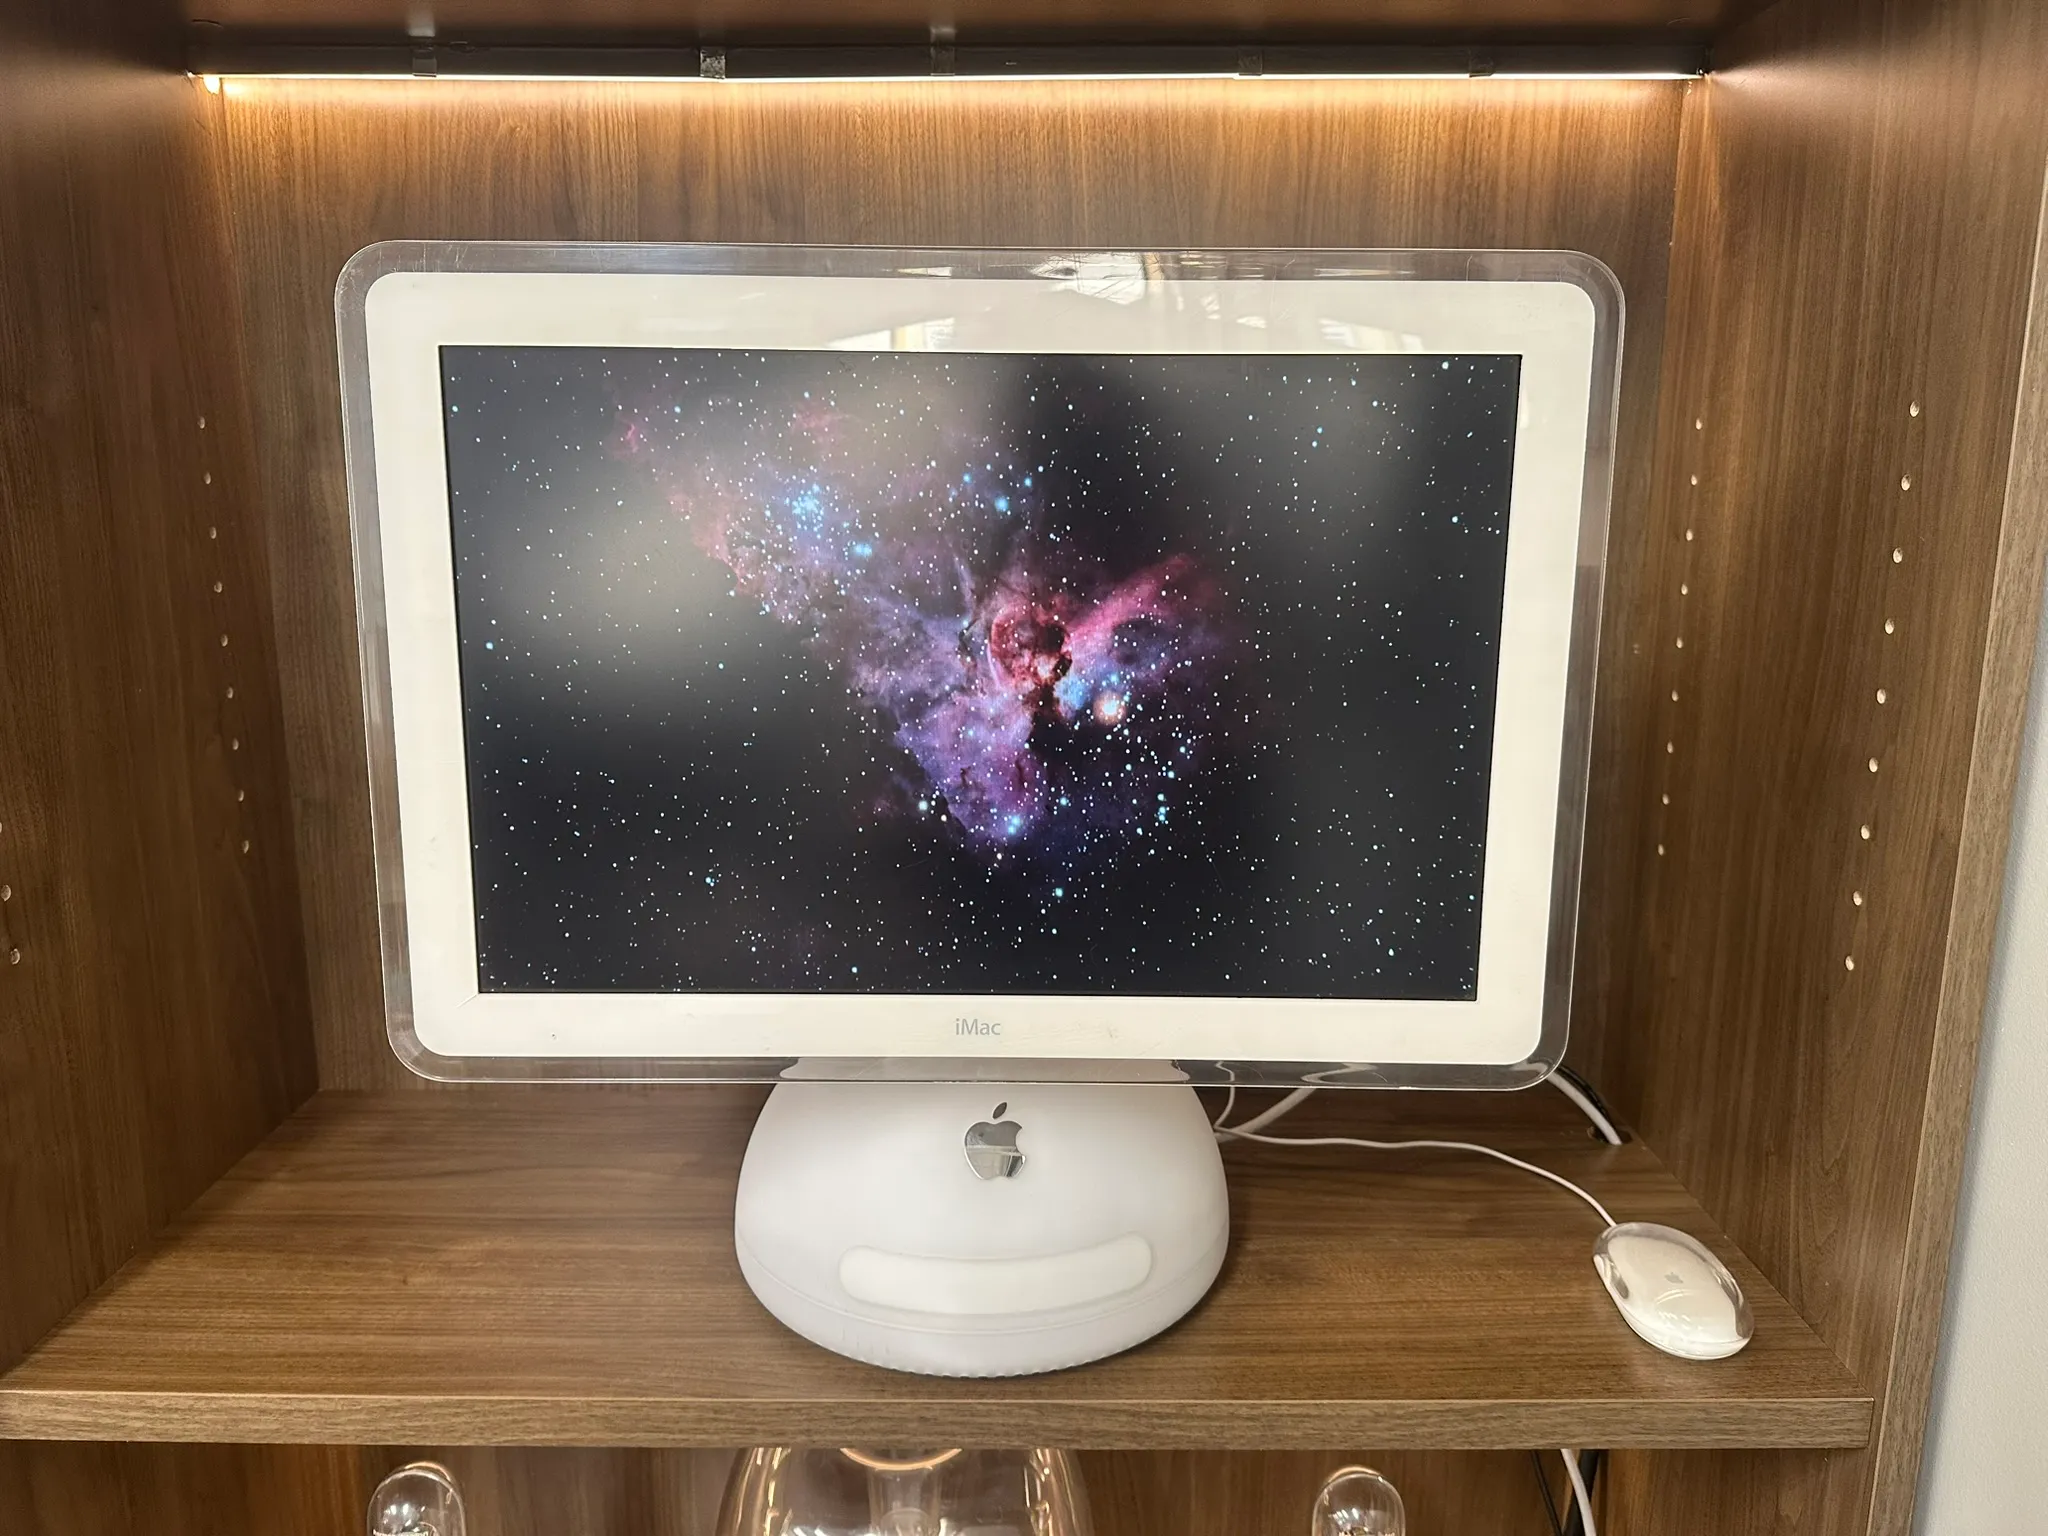
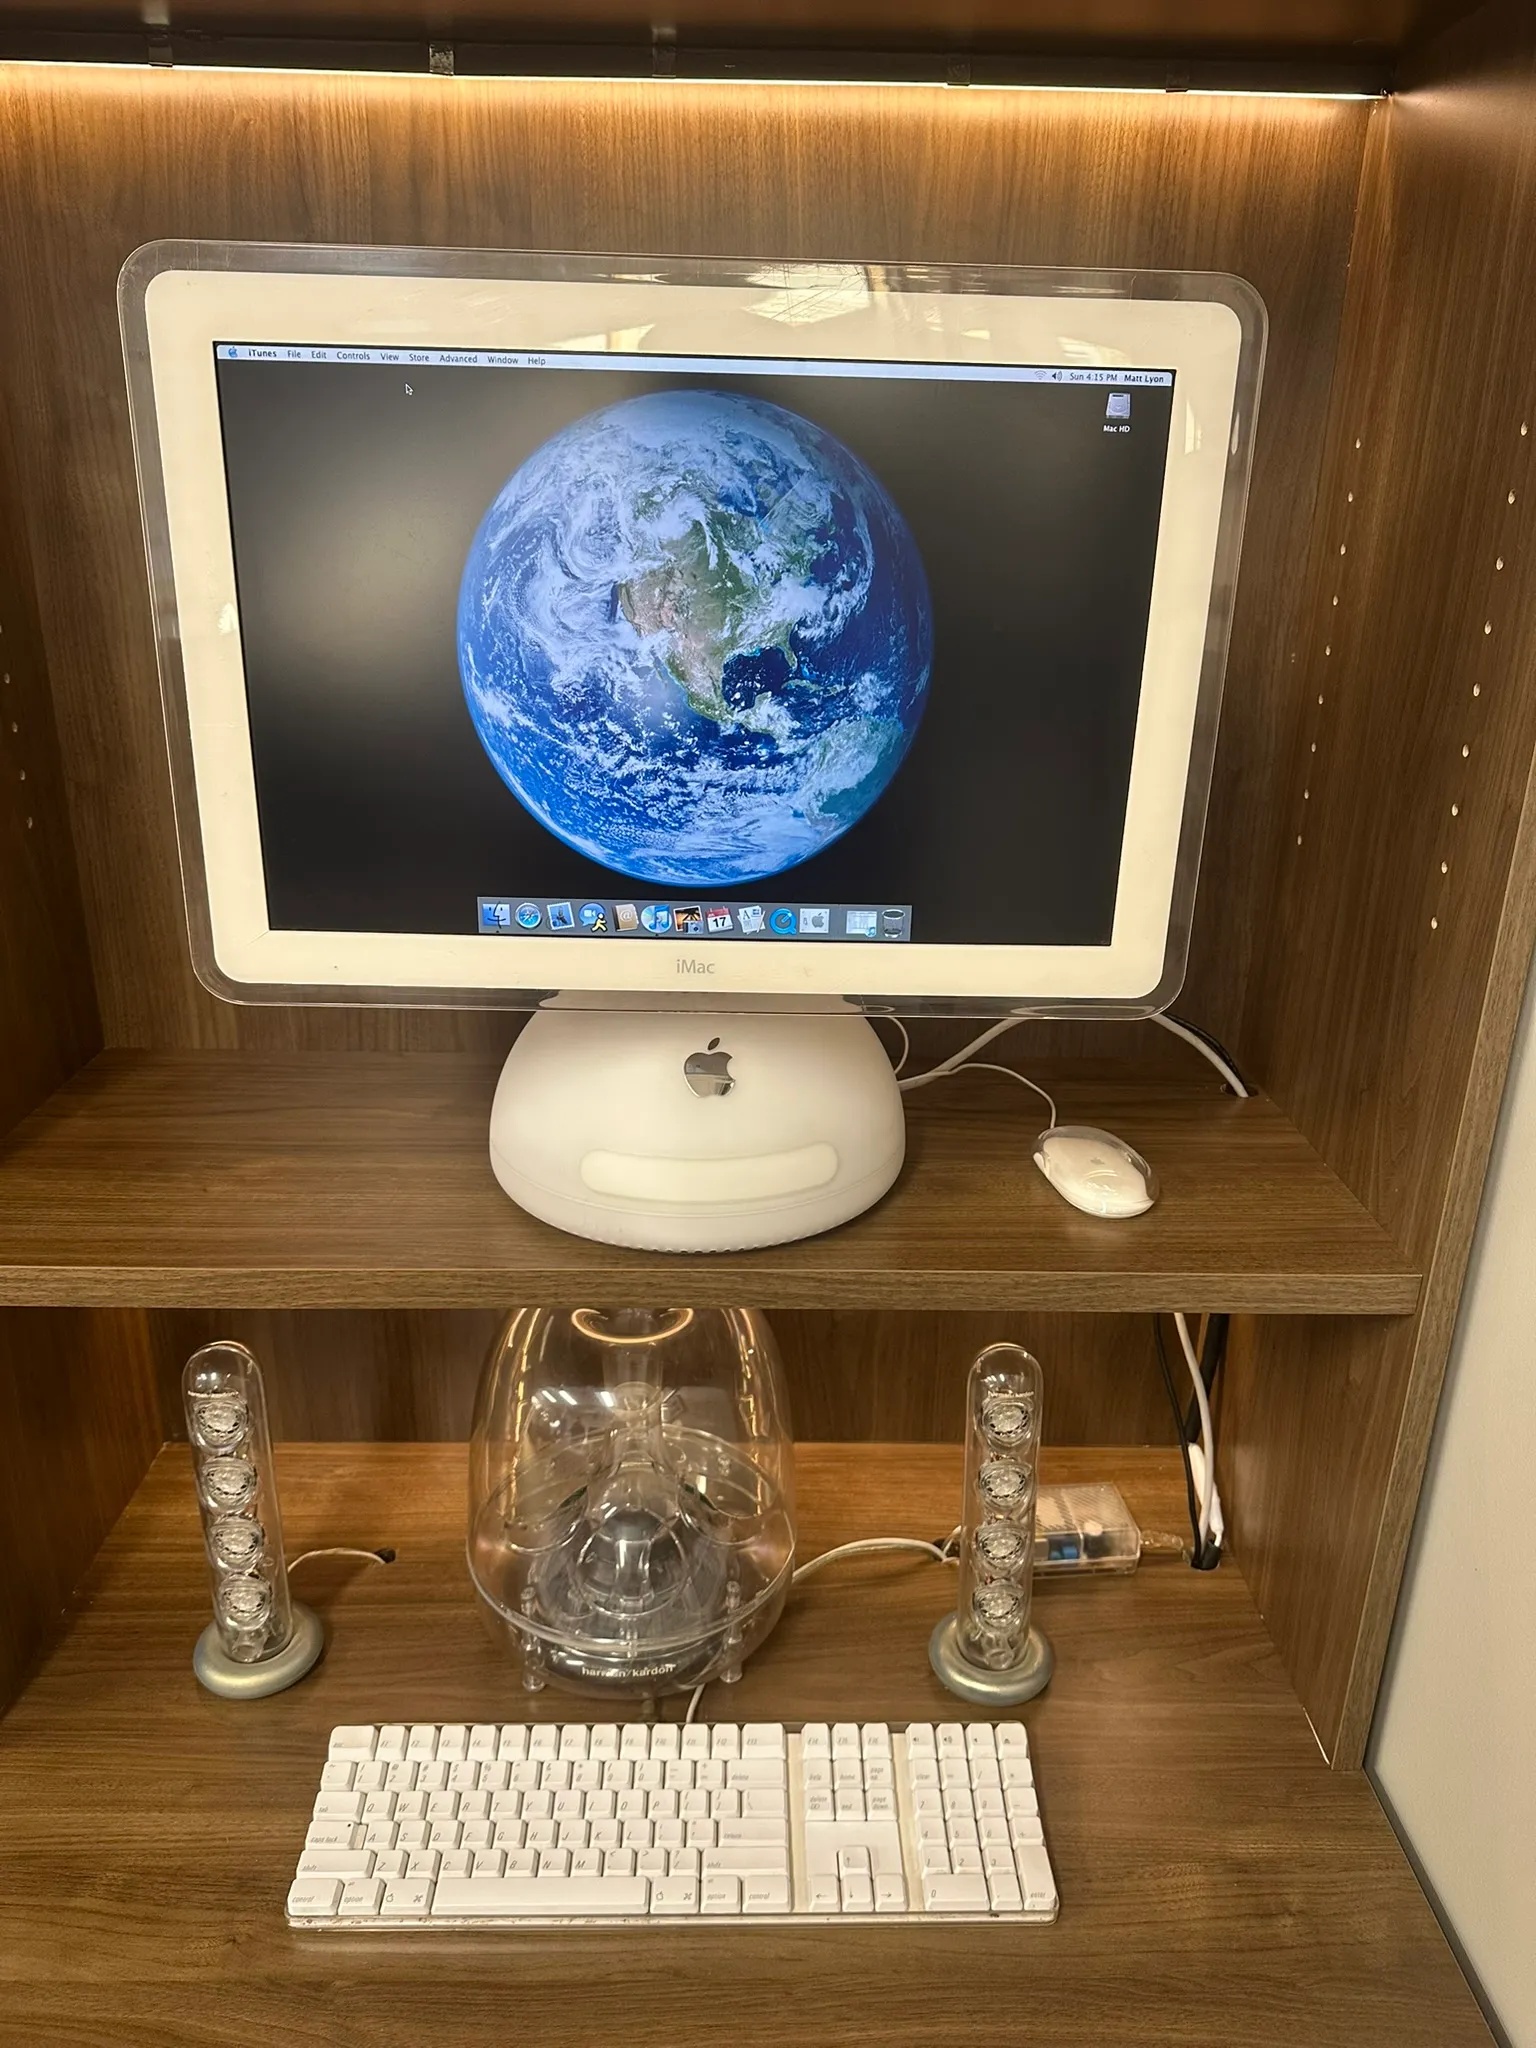
The full setup Mac with the premium speaker towers and bass. The USB powered speakers sound excellent.
All in all, it was a fantastic restoration and very approachable if you’re comfortable working around mains-powered supplies.
I’ve since bought two more broken iMac G4s on eBay, and I strongly suspect they suffer from the same issue. Even in 2025, these machines are easy to find non-functional for under $150.
If you have questions about repairing an iMac from this era, feel free to email me. I’m always happy to help.